
2nd Gen wired IP camera how to add to iSpy and record (NCIP2)Updated 13 days ago
In this guide, we will show you how to connect your HD IP bird box camera to iSpy, how to set it up to record onto your Windows PC, and how to set up a recording schedule and motion detection.
Before You Begin
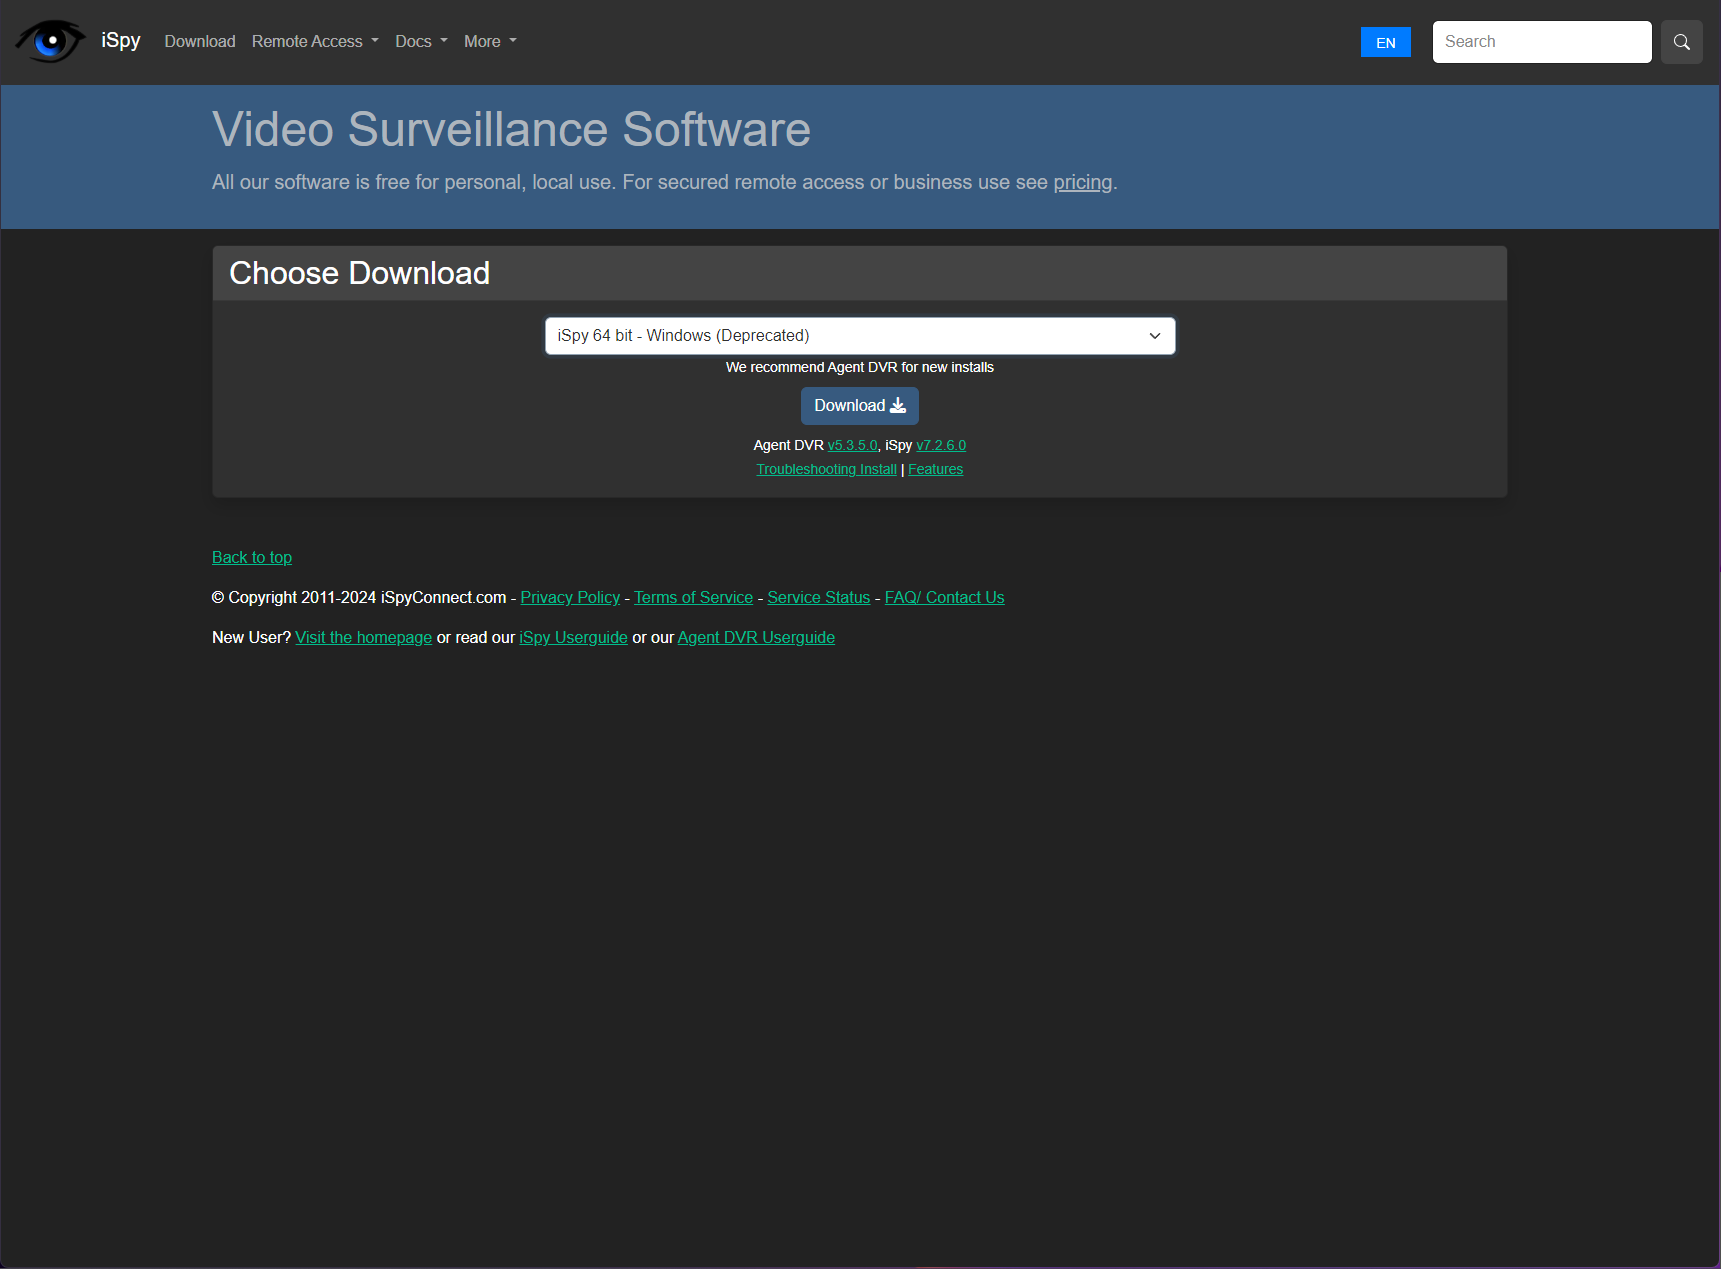
You will need a HD IP bird box camera, a windows PC and the program iSpy (click this link to download and install it). Make sure that you download the original version of the program which can be found at the bottom of the page, not Agent DVR. Agent DVR works in a very similar way to iSpy but has a different interface, so the instructions in this guide do not apply.
Make sure that the camera is connected to your internet router before you begin.
Let’s Get Started
Adding the camera to iSpy
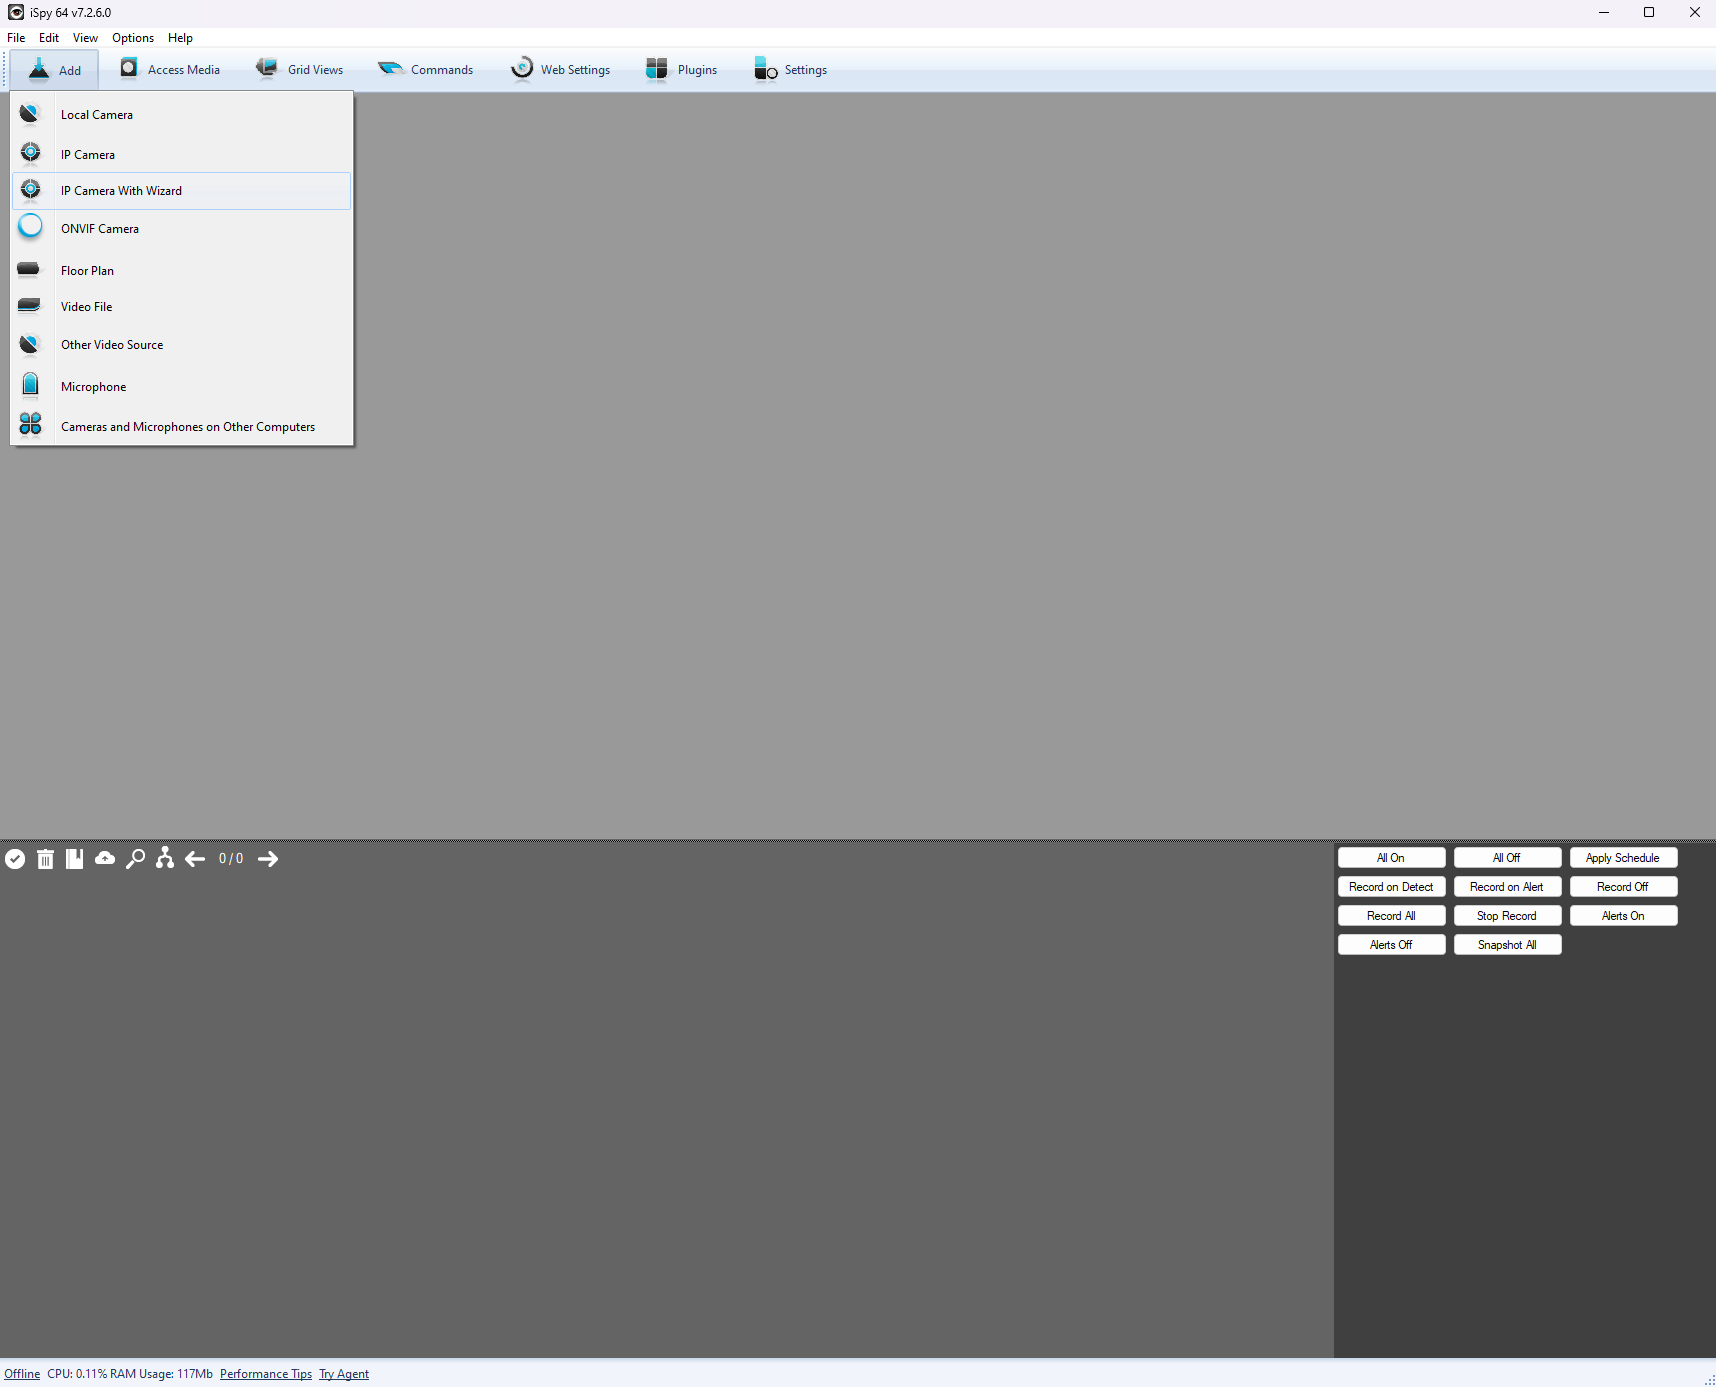
Open up iSpy and select Add > IP Camera With Wizard
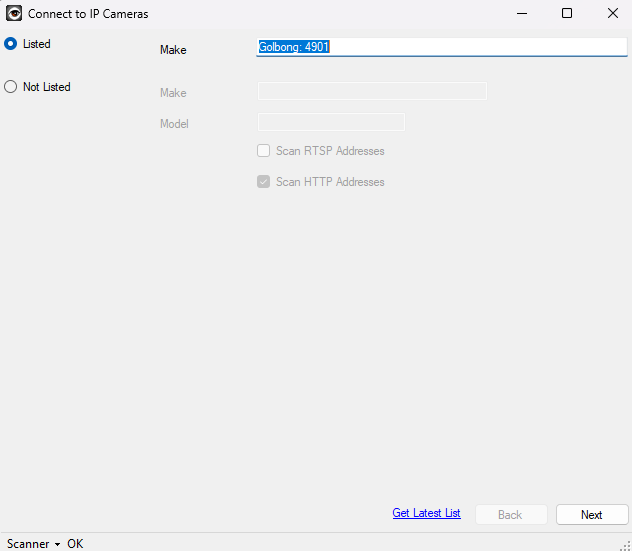
Type Golbong: 4901 into the Make field then click Next
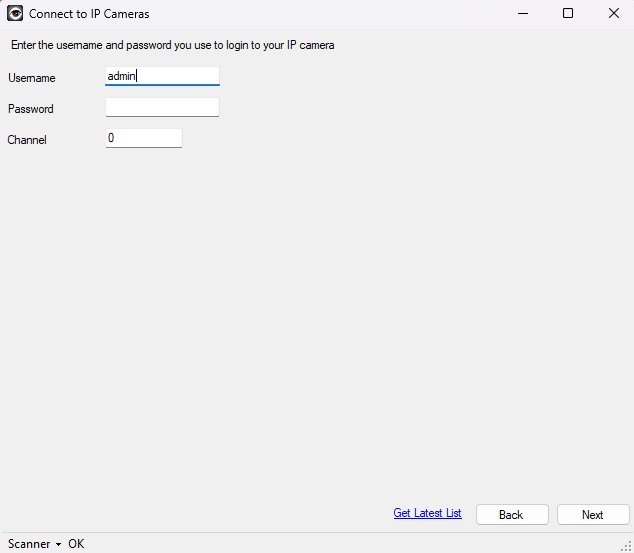
Enter the username and password you use for the camera. By default the username is admin and the password can be left blank. Channel can be left as 0.
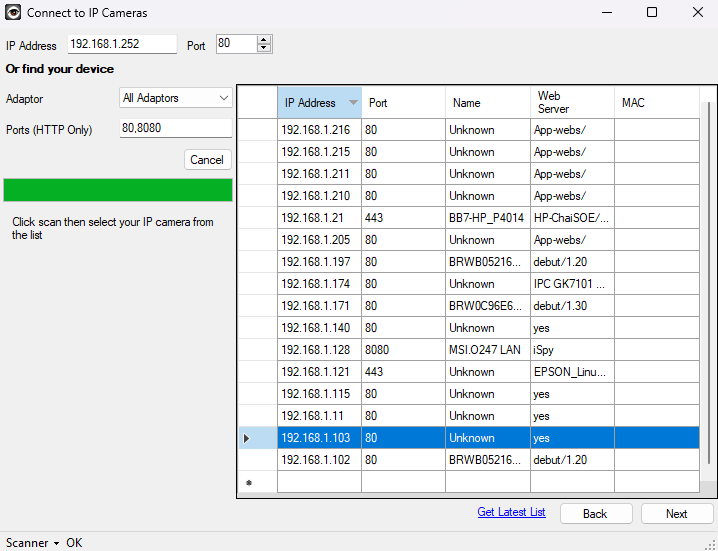
Click on Scan Local Network and wait until it finishes. You will see a list of all the devices connected to your network; the camera will have the Device Name Unknown. Select it and click Next.
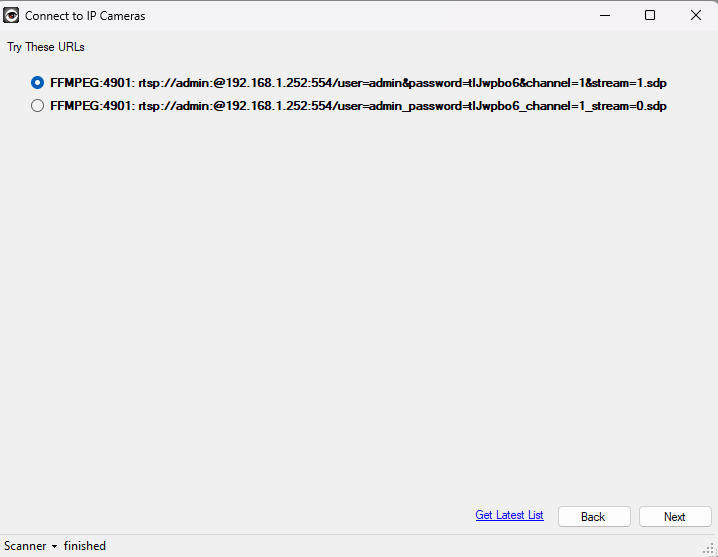
Select the first URL in the list and click Next.
Click Next again.
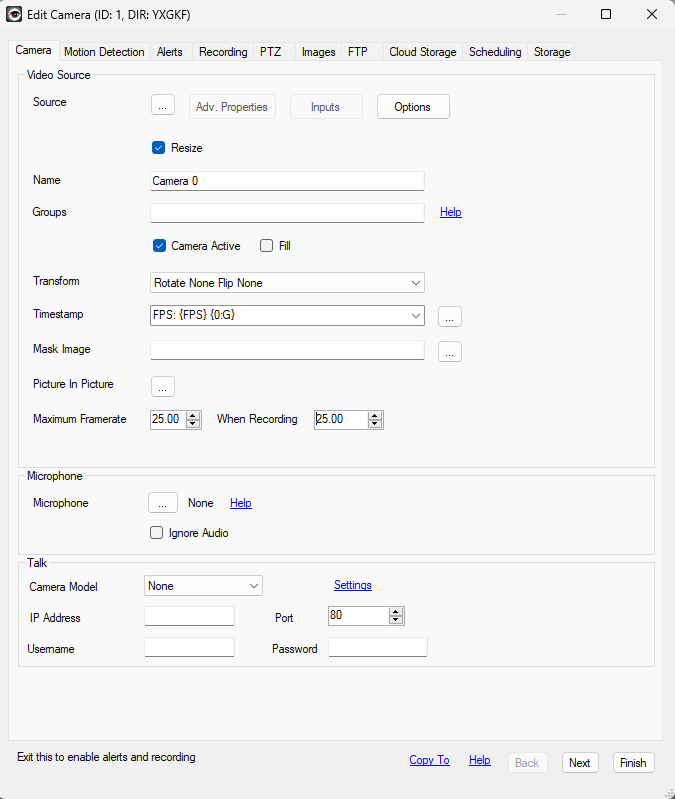
You will be taken to a final window where you can edit the camera settings. We would advise increasing the maximum frame rate for live view and recording. We recommend the standard frame rate of 25 but you may want to experiment with this.
Finally, click Finish again and you should see your camera feed up and running!
Setting up motion recording
Now we're going to activate motion recording! Right click on the camera feed and click Edit.

Select the second tab at the top called Motion Detection.
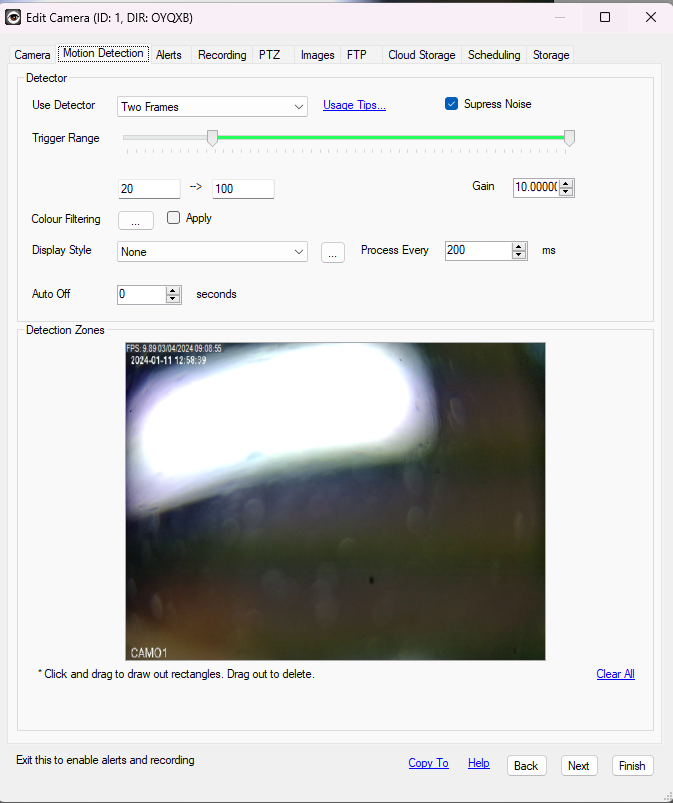
Detector Type is the method iSpy uses to determine if motion has been detected, I have pasted the descriptions from the iSpy website for each type:
Two Frames: Probably the most common type you would use. iSpy just compares the last frame to the current frame.
Custom Frame: iSpy stores one frame in memory and compares subsequent frames to this - good for detecting if things change - say someone takes a bag out of the scene.
Background Modelling: iSpy takes a custom frame but adjusts it over time to morph it towards the current frame. This is good when you have something in your scene that is constantly moving - ispy will learn to ignore it.
None: No motion detection, use this if you are just recording on a schedule or want to record a timelapse video or record on demand.
If you want to explore the full range of motion detection options available check out this article.
Setting up a recording schedule
Now let's set up a recording schedule; just like before right click on the camera feed and click Edit.
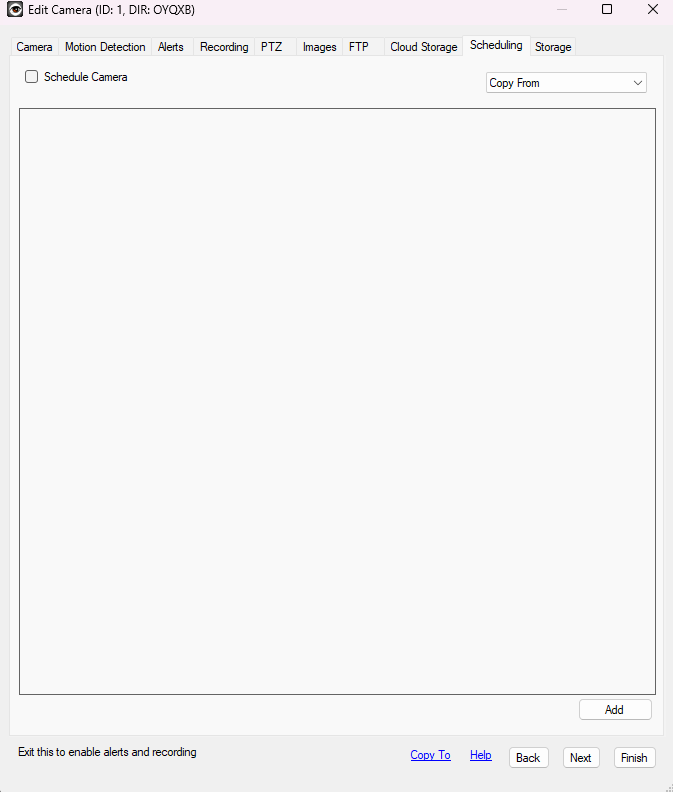
Now select the Scheduling tab at the top of the window and click Add at the bottom.
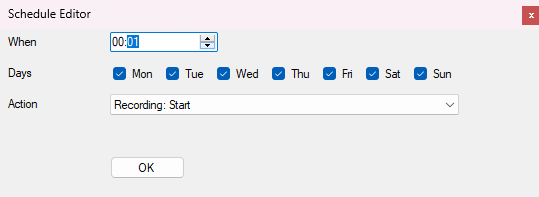
The Schedule Editor will now open. This allows you to select an action, the time of day it will be activated, and which days of the week it will apply to. I will be setting the camera up to record every single day of the week. In the screenshot below I have set the camera to start recording at the beginning of the day, and applied this setting to each day of the week.
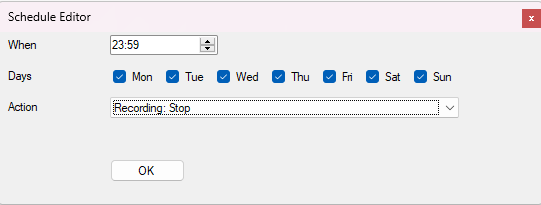
Now we need to tell it when to stop recording; as you see in the screenshot below I have told it to stop recording at the end of the day, and applied it to every day of the week.
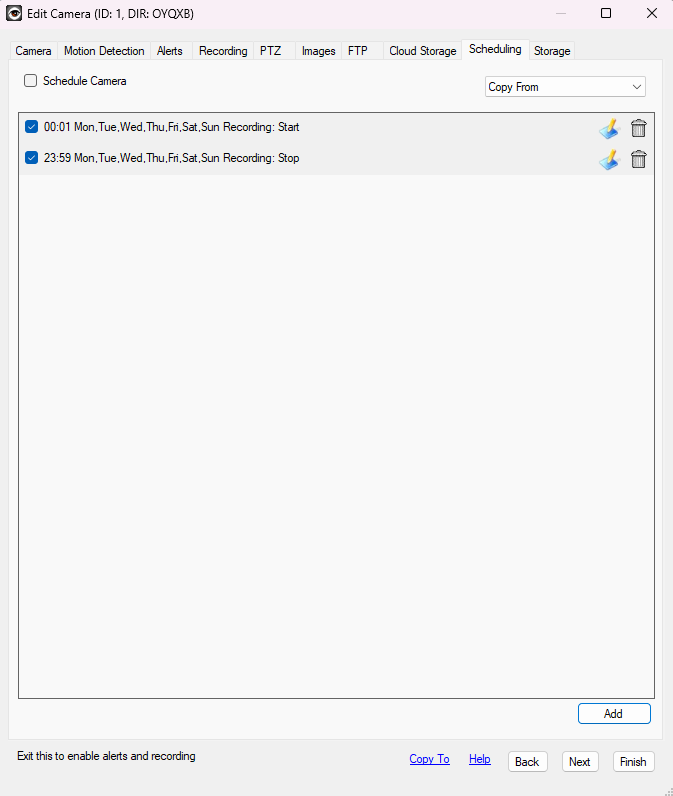
Now you see the two actions are listed below, showing that at a certain time on every day of the week it will begin recording, and at a different time it will stop recording. Just click on Finish and you will be taken back to the live view screen.
If you want to configure the scheduling to a greater depth, I recommend you look at this article on the iSpy website which goes into further detail.
Your camera should now be fully configured to record now. To view the files it records you need to click on Access Media then Files.

The folder containing the files will be opened up, when you open the Video folder you will find a list of folders with random strings of letters for names. Just sort them by Date Modified to organise them by date.
For further information about the numerous features this program has I recommend you look at the iSpy user guide.
Need more help?
If you need help with anything else please check out our other guides or get in contact.