
How to set up your USB video capture device on a Windows computerUpdated a month ago
This guide shows you how to set up your USB video capture device on a Windows PC. If you have a Mac, please follow this guide instead.
If your USB capture device is black you have one of the new models - see the next section. If your USB capture device is silver, you have one of the older models - scroll down to the section where it says 'Old model'.
New model
Connect the USB Device to your computer and wait for the PC to finish installing the ‘AV TO USB 2.0’ driver.
Once this has finished, install a free program called iSpy so you can view the camera on your computer.
Just search for iSpy download online, or use the following link: http://www.ispyconnect.com/download.aspx
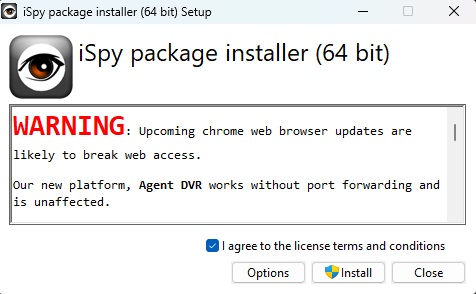
Download the iSpy application. If you're not sure whether you need to use 32-bit or 64-bit, then just download the 32-bit version. Do not download the Agent DVR.

Open the .zip file by right-clicking on it and selecting Extract All.

You will get the following message, make sure to click Allow Access.
iSpy will now open. Click OK to close the welcome message, then click Add in the top-left corner, then Local Camera.
A window will pop up saying Video Source. T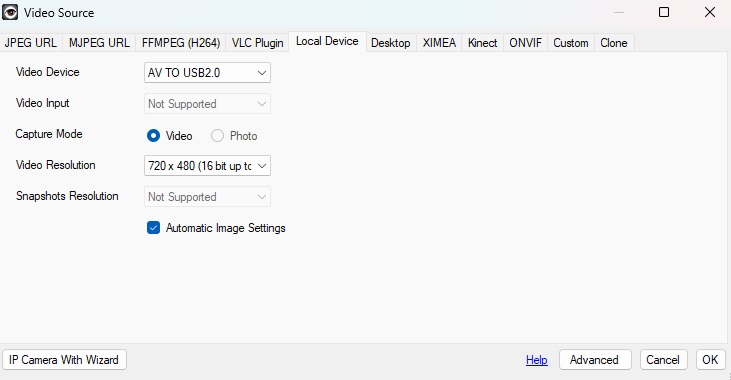 he video device should say AV TO USB2.0. Change the video resolution to 720x480 or the highest resolution available, then click OK.
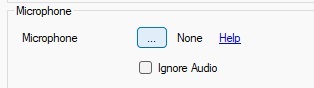
You will now see the Edit Camera window pop up. You will need to click on the box with three dots under Microphone.
Select New, then click next.
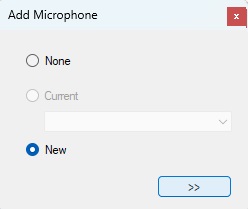
Now a Microphone Source window will pop up. The device will say Microphone (AV TO USB2.0). Click OK. If your camera has audio it will now be accepted by the programme.

You will be taken back to the Edit Camera window. Just click Finish and your camera is now fully set up.
Old model
If you're unsure how to wire up your camera check out this video. But please be aware if you have the newer model the rest of the instructions won't apply.
Installing the Drivers for your Capture Device
Connect the USB Device to your computer and follow the link below. Once it has downloaded, run the installation which is enclosed.
Download and Installing iSpy
Now you need to get the software download to view the cameras on which you can get here.
Download the iSpy software onto your computer, if you don't know whether you need 32 or 64 bit,  just download the 32 bit version. Do not download the Agent DVR.
Once you have downloaded iSpy you need to extract the file, to do this right-click on it and select 'extract all' or 'extract here'.

Once extracted run the iSpy setup and follow the steps to install it.
Once the installation has finished there will be a shortcut on your desktop which you double-click to load the software.
When the below message pops up, click allow access.
Press OK on the welcome message to close this box.
Adding your Camera to iSpy
Press the Add button and then select Local Camera.
Now get the Video Source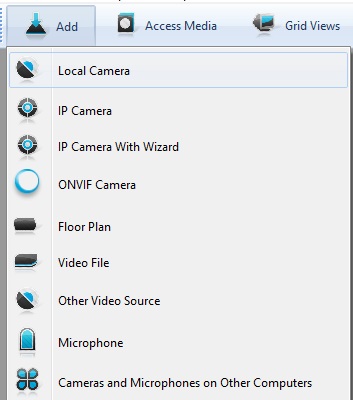 box will pop up. Make sure the Video Device is set to USB2.0 VIDBOX FW (it may also show up as USB 2861) and that the Video Resolution is set to 640 x 480.
Check that the Video Input is also set to 2. VideoComposite.
Then press OK.
When the below window pops up make sure Maximum Framerate is set to 25 and the same for 'when recording'.
Click on the finish button. Your USB Capture Device is now installed and ready to be used to view live video feed from your connected camera.
Need more help? Here are our support packages for expert troubleshooting.
Need more help?
If you need help with anything else please check out our other guides or get in contact.